
I thought it was about time I made a tutorial explaining how to graft in pattern - it's a technique I use often, and it's required for a neat finish on a number of my patterns, including Nennir, Cinioch and Tallorcen. Regular grafting in stockinette - also called Kitchener stitch - is a technique that uses a darning needle and yarn to sew live sts together in a way that perfectly imitates a row of knitting. Done properly, with close attention paid to the tension of the yarn, it can be completely invisible. It also has the advantage of joining sts together without the bulk of a seam, which is why it's often used to close sock toes. Grafting in pattern - i.e. grafting across a row of mixed knit and purl sts - is not significantly difficult, if you already know how to graft in stockinette. I'm going to assume in this tutorial that you do already know stockinette grafting - if not, I recommend reading this and having a practise before attempting to graft in pattern!
I find that grafting is all about rhythm, and mantra - in stockinette grafting, everything goes fine as long as I repeat in my head "Knit off, purl on... purl on, knit off". Or even just "Knit, purl... purl, knit," because once you get into the rhythm of slipping off the first stitch on front and back needle, and leaving the second stitch on, it becomes second nature.
Here's a condensed guide to how to graft in pattern, which will make more sense once you look at the photos and video below:
(F = front needle, B = back needle)
2 (or more) k sts on F (Stockinette grafting) F: knit off, purl on B: purl off, knit on
1 k st, 1 p st on F F: knit off, knit on B: knit off, purl on
1 p st, 1 k st on F F: purl off, purl on B: purl off, knit on
2 (or more) p sts on F (Reverse stockinette grafting) F: purl off, knit on B: knit off, purl on
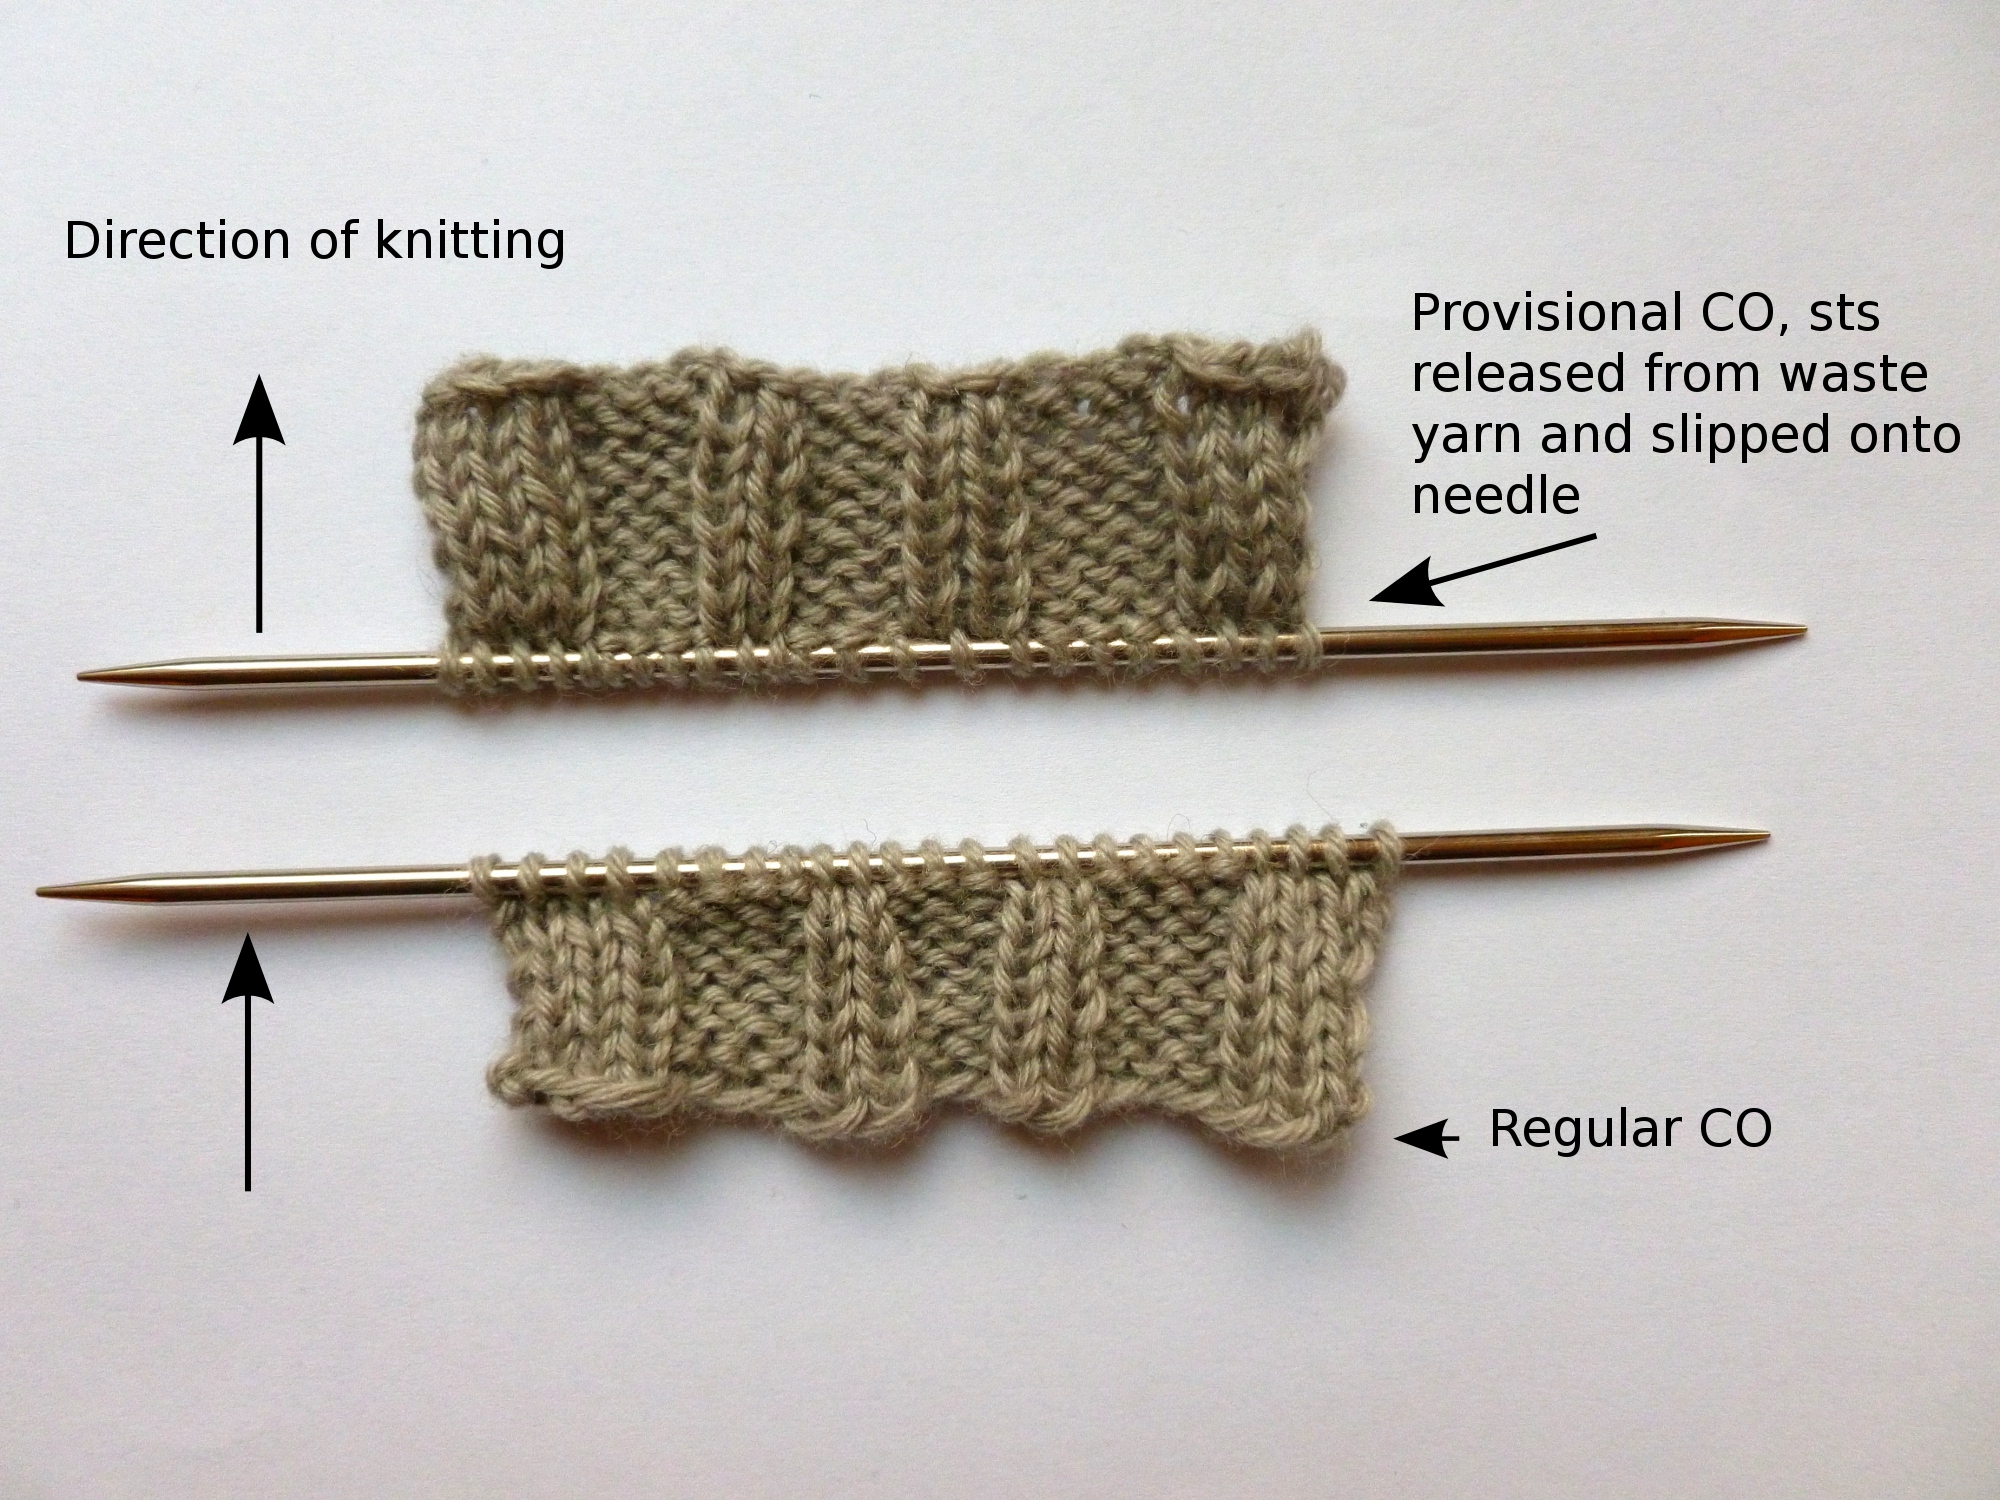
Firstly, something very important indeed - grafting in pattern will only work perfectly if the direction of knitting is preserved in the two pieces being grafted together. In other words - if you make two separate cabled panels, worked from the CO up, and then tried to graft the live sts together, there will be a half-stitch jog. The cable sections - usually columns of 2 k sts over a purl background - will not align perfectly and it might look a bit strange. Imagine an arrow that starts at your CO edge and points up towards your live sts. If you're trying to graft two pieces together and the arrows point at each other, you will have the half-stitch jog.
If you start a cabled panel with a provisional CO, work for as long as the panel needs to be, then graft your live sts to the sts held by the provisional CO, then the direction of knitting is preserved and the sts will all align perfectly. This is often the construction used in cabled hat bands, cowls, waistbands, cuffs, etc.
If you'd like to follow along with the tutorial, CO 23 sts using any standard CO (like long-tail) and work as follows for a few rows: RS: k4, p4, k2, p3, k2, p4, k4. WS: p4, k4, p2, k3, p2, k4, p4. Leave the live sts on the needle.
Then CO 23 sts using provisional CO, work for a few rows in the above stitch pattern and BO. Undo the provisional CO and slip the 23 sts onto a needle.
You should have something like this:
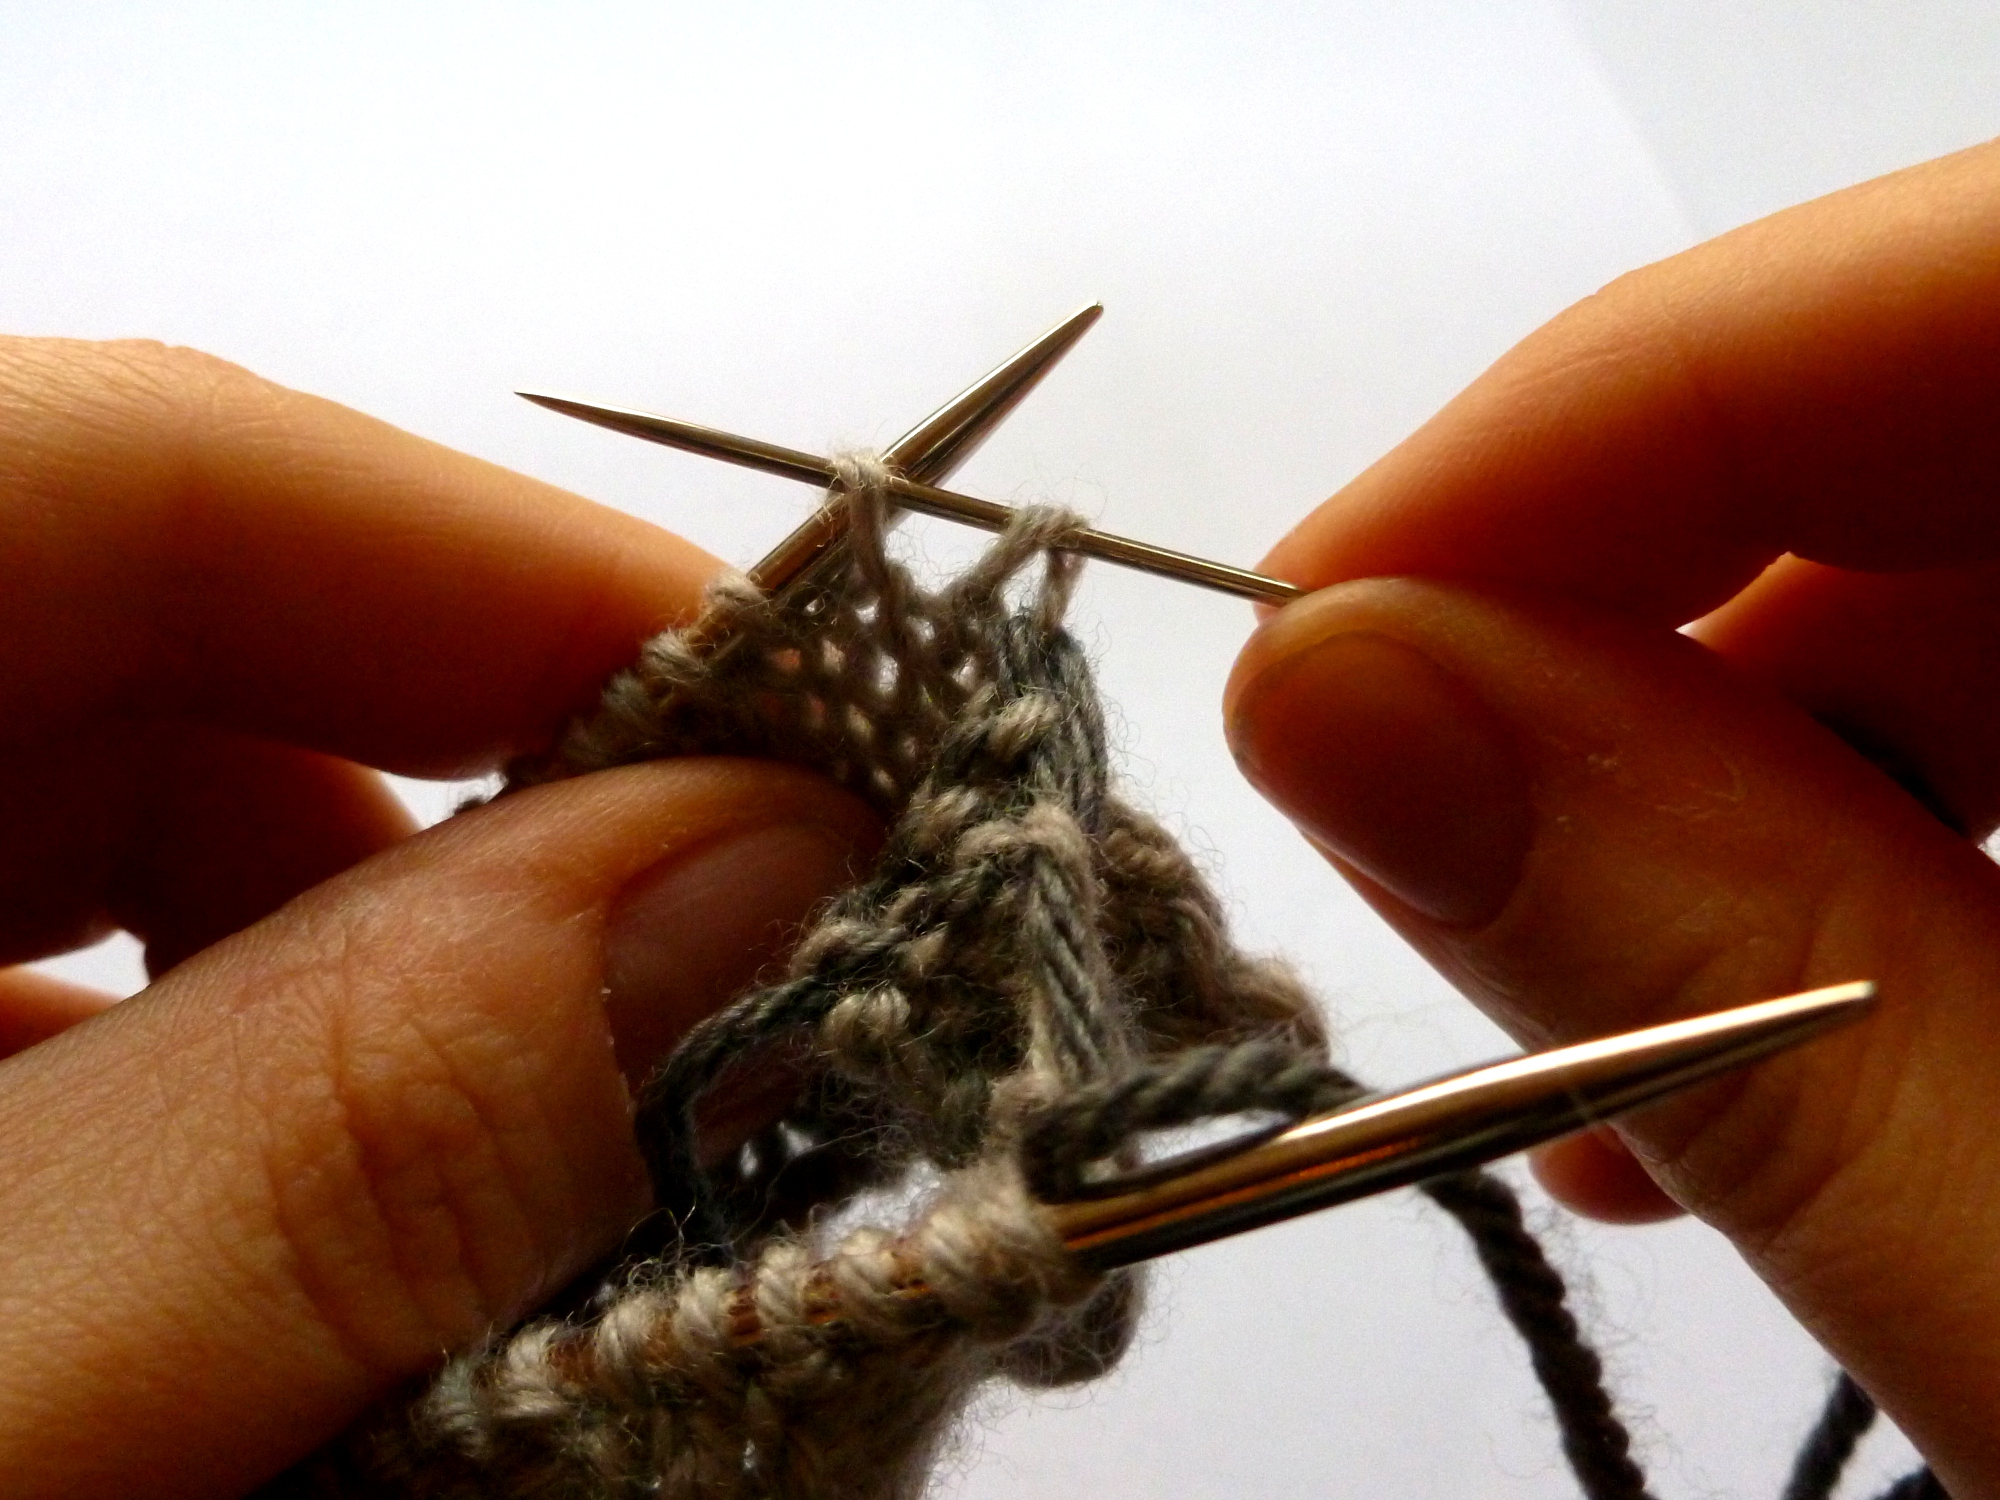
After grafting the first few stitches as for regular stockinette, stop when you have a k st followed by a p st on your front needle! It will look like this:
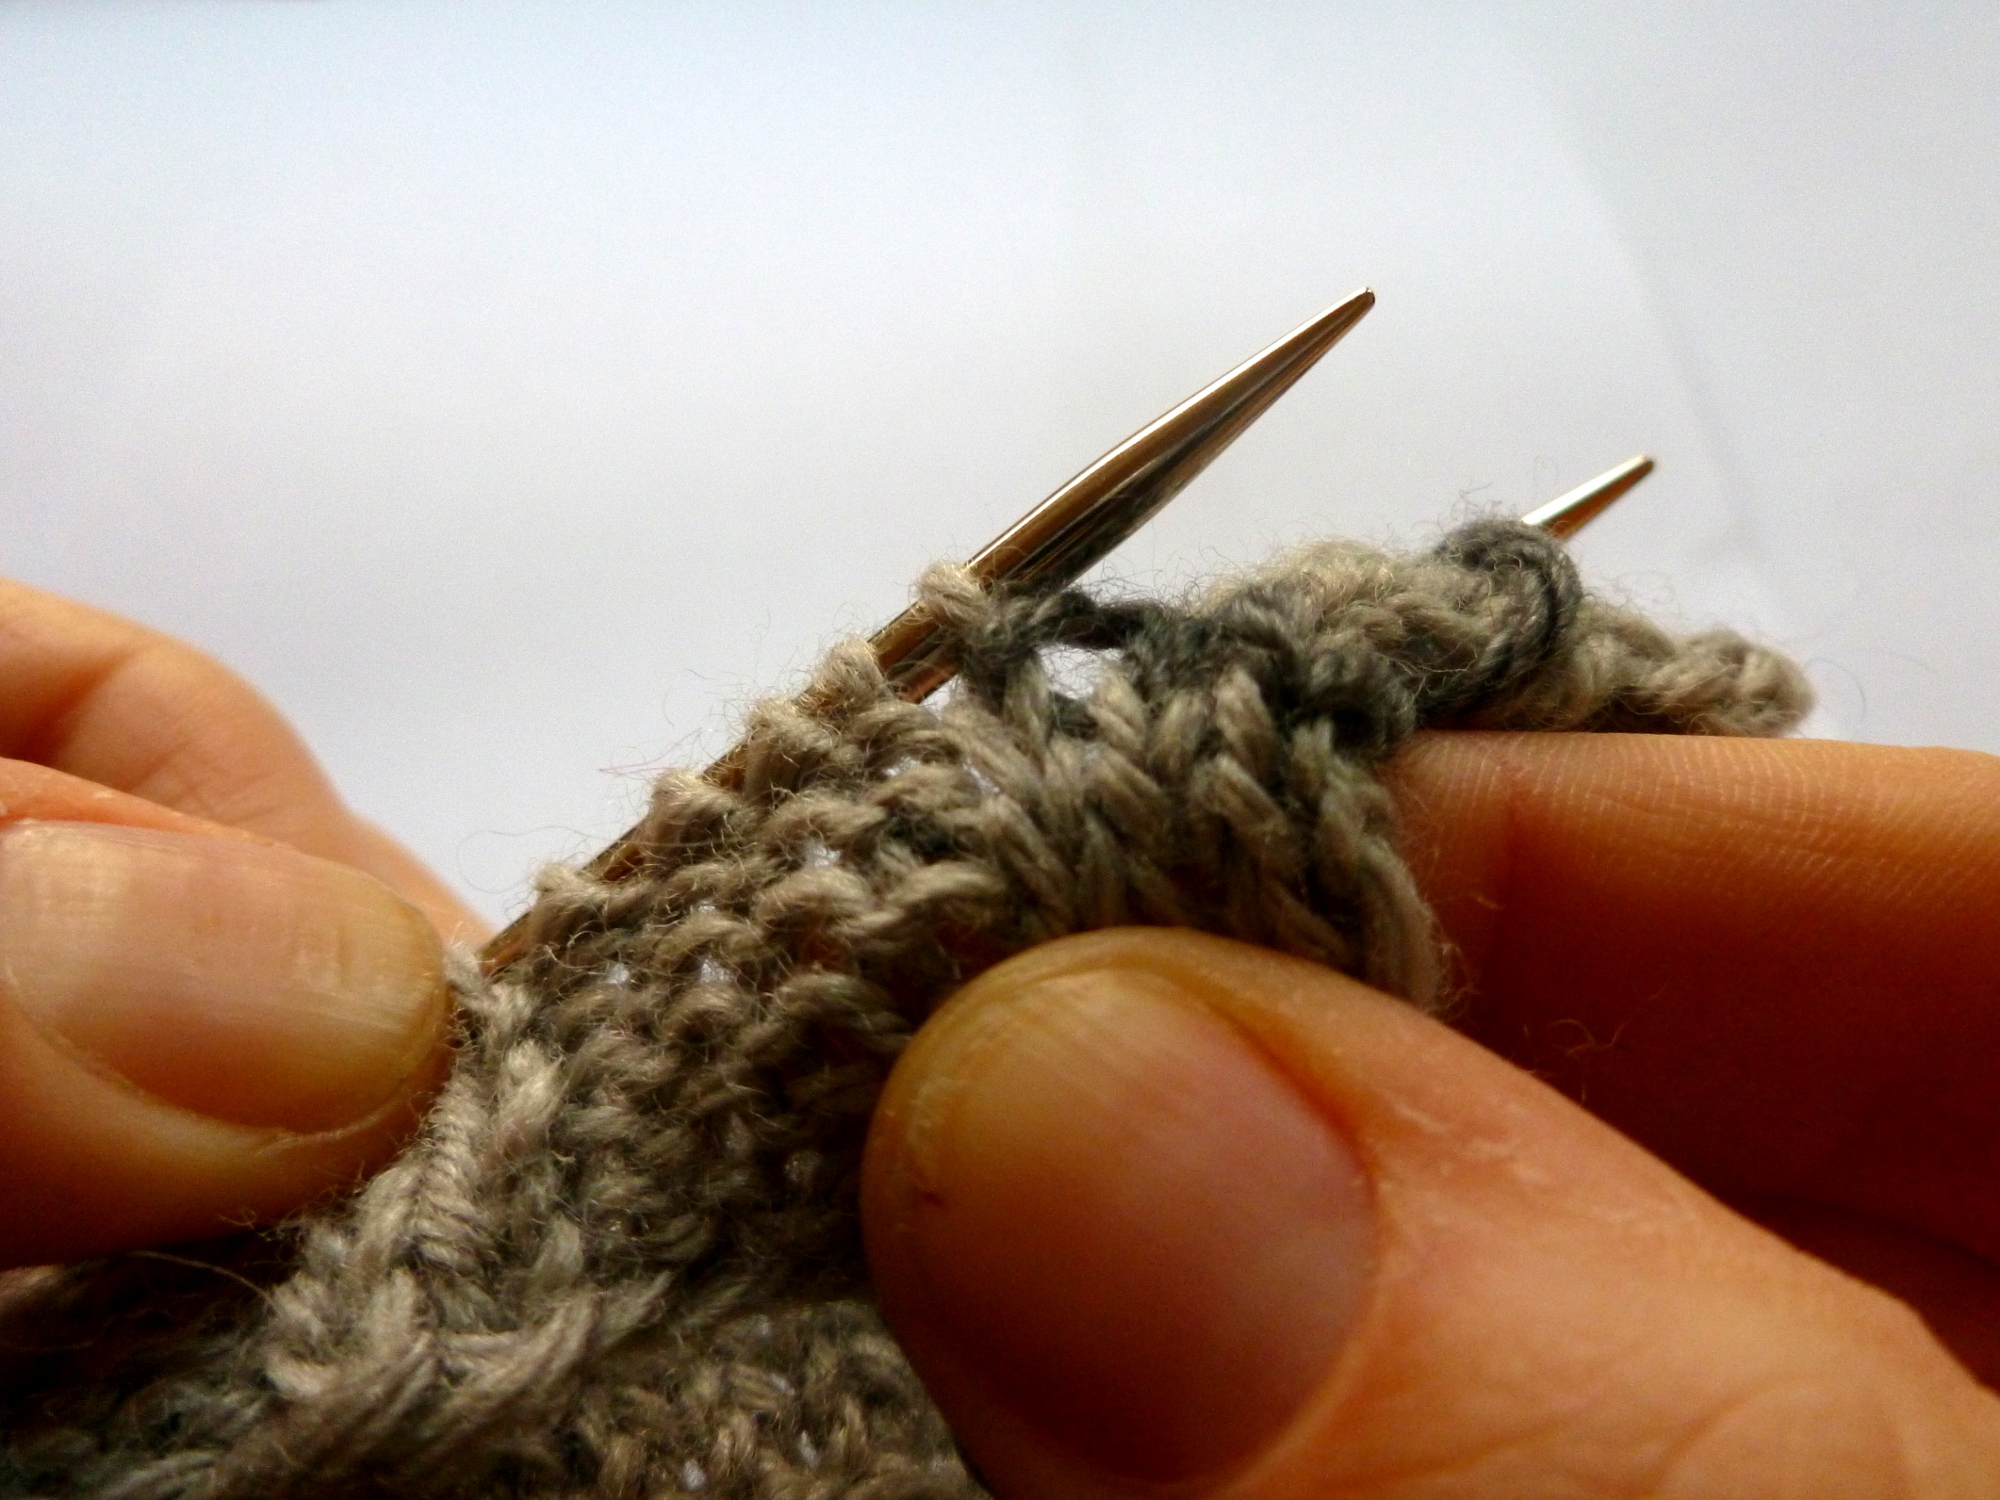
For the transitions between k and p sts, the way in which you insert the needle has to change slightly. So, insert the needle knitwise (and slip st off, not shown):

Then insert needle knitwise (and leave st on, pull yarn through):
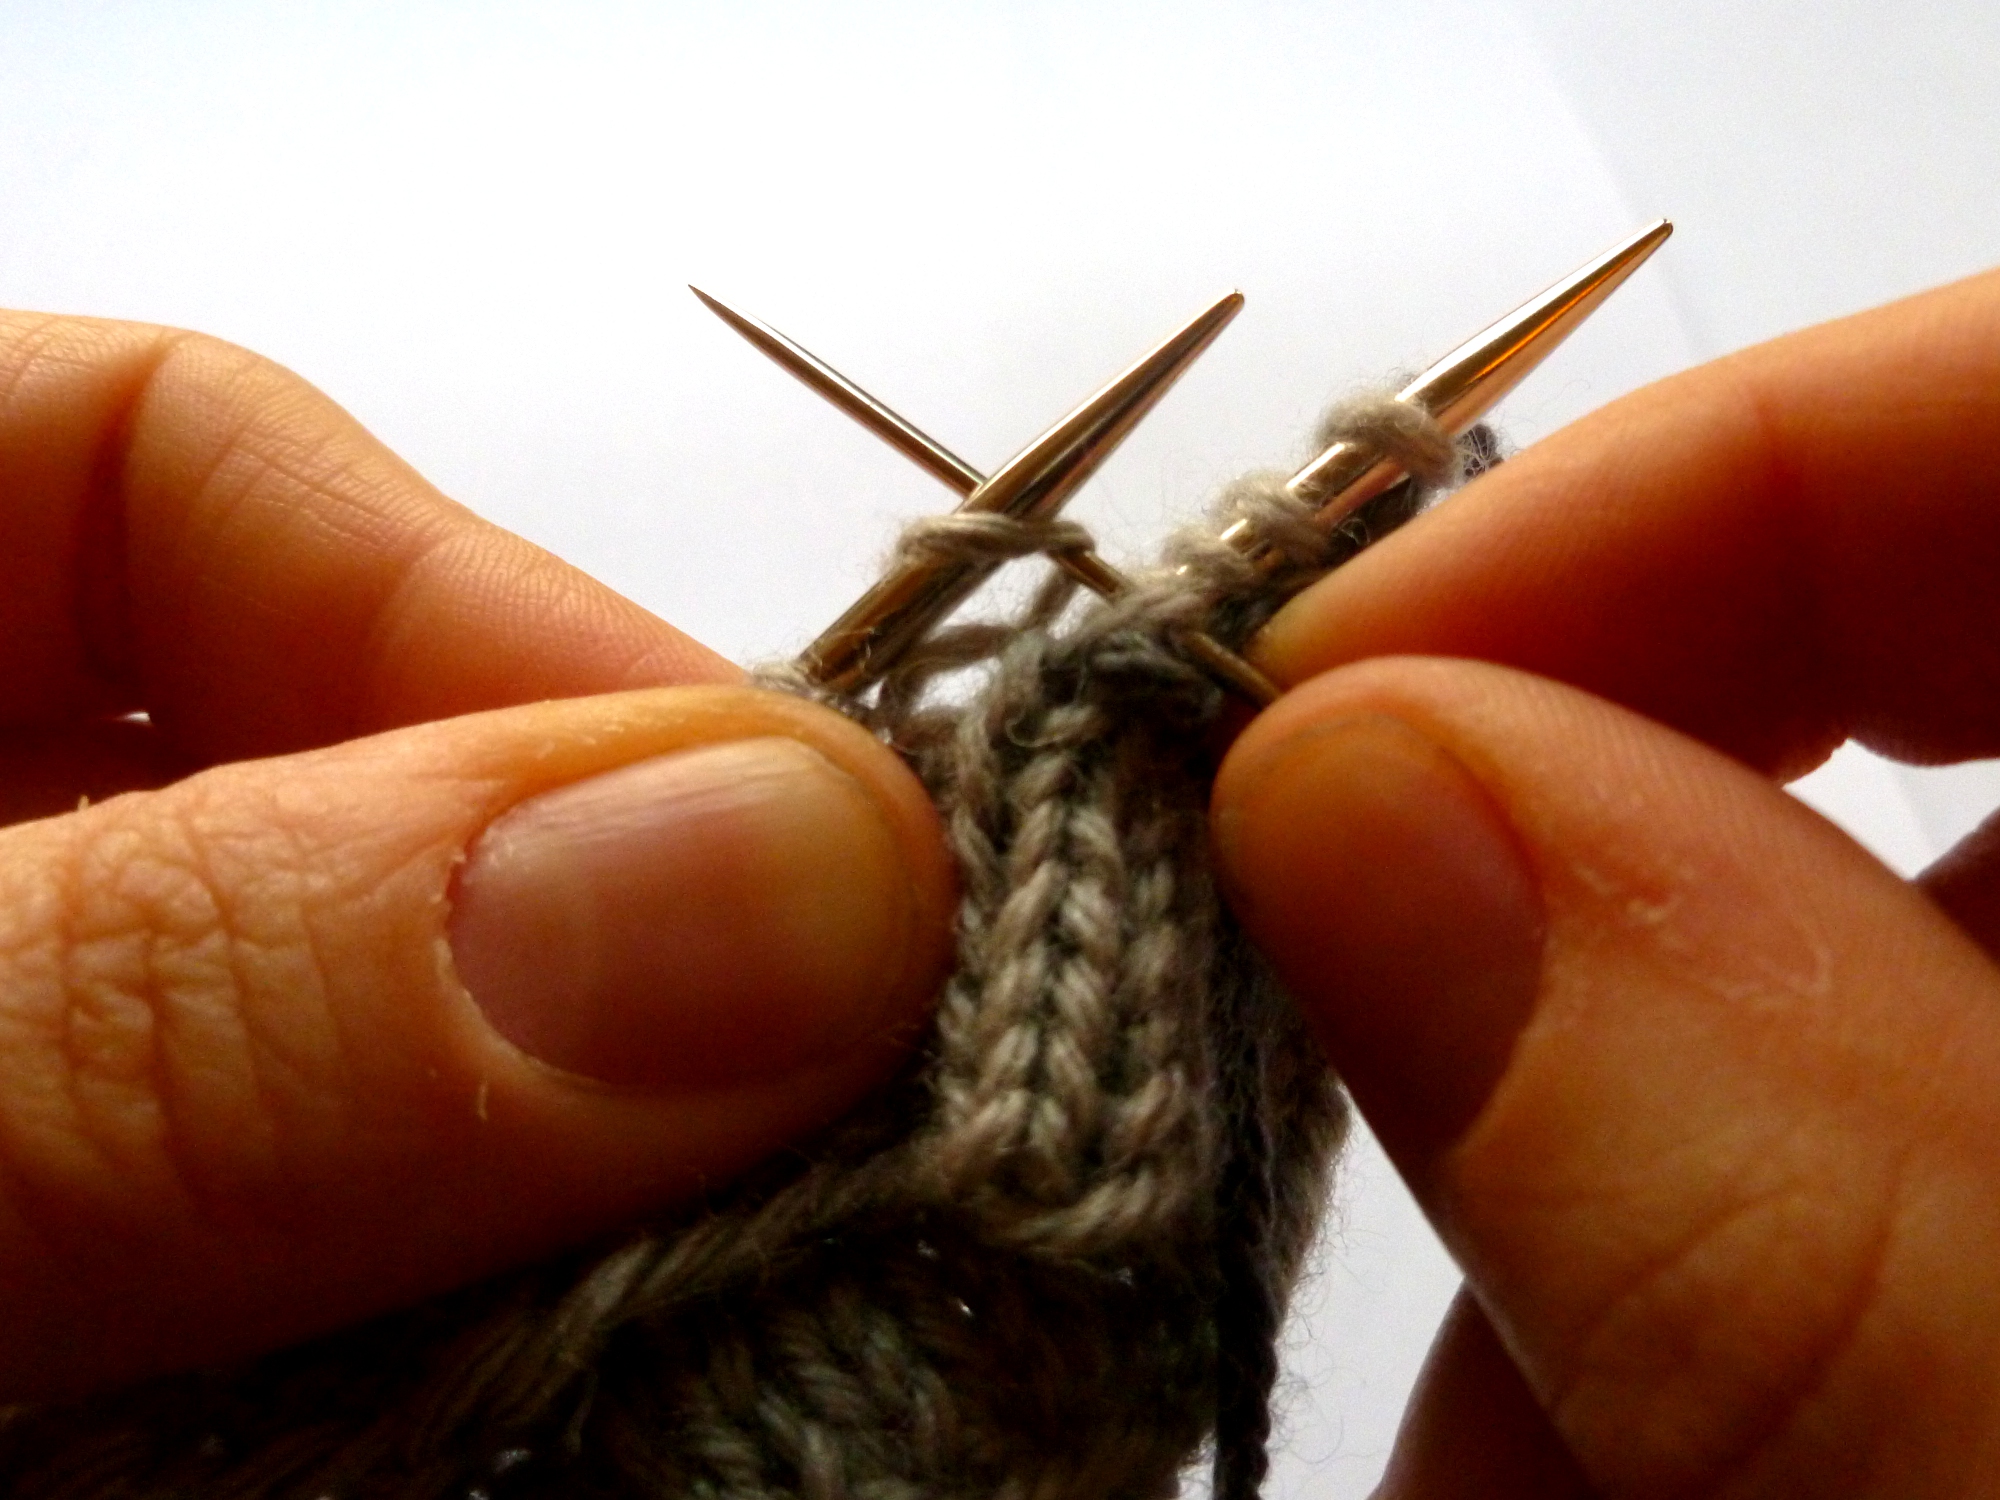
On the back needle, insert needle knitwise (and slip st off, not shown):
Then insert needle purlwise (and leave st on, pull yarn through):
After this, it's reverse stockinette grafting for a few sts. So, like regular grafting but backwards! Purl off, knit on... knit off, purl on. Like so!:

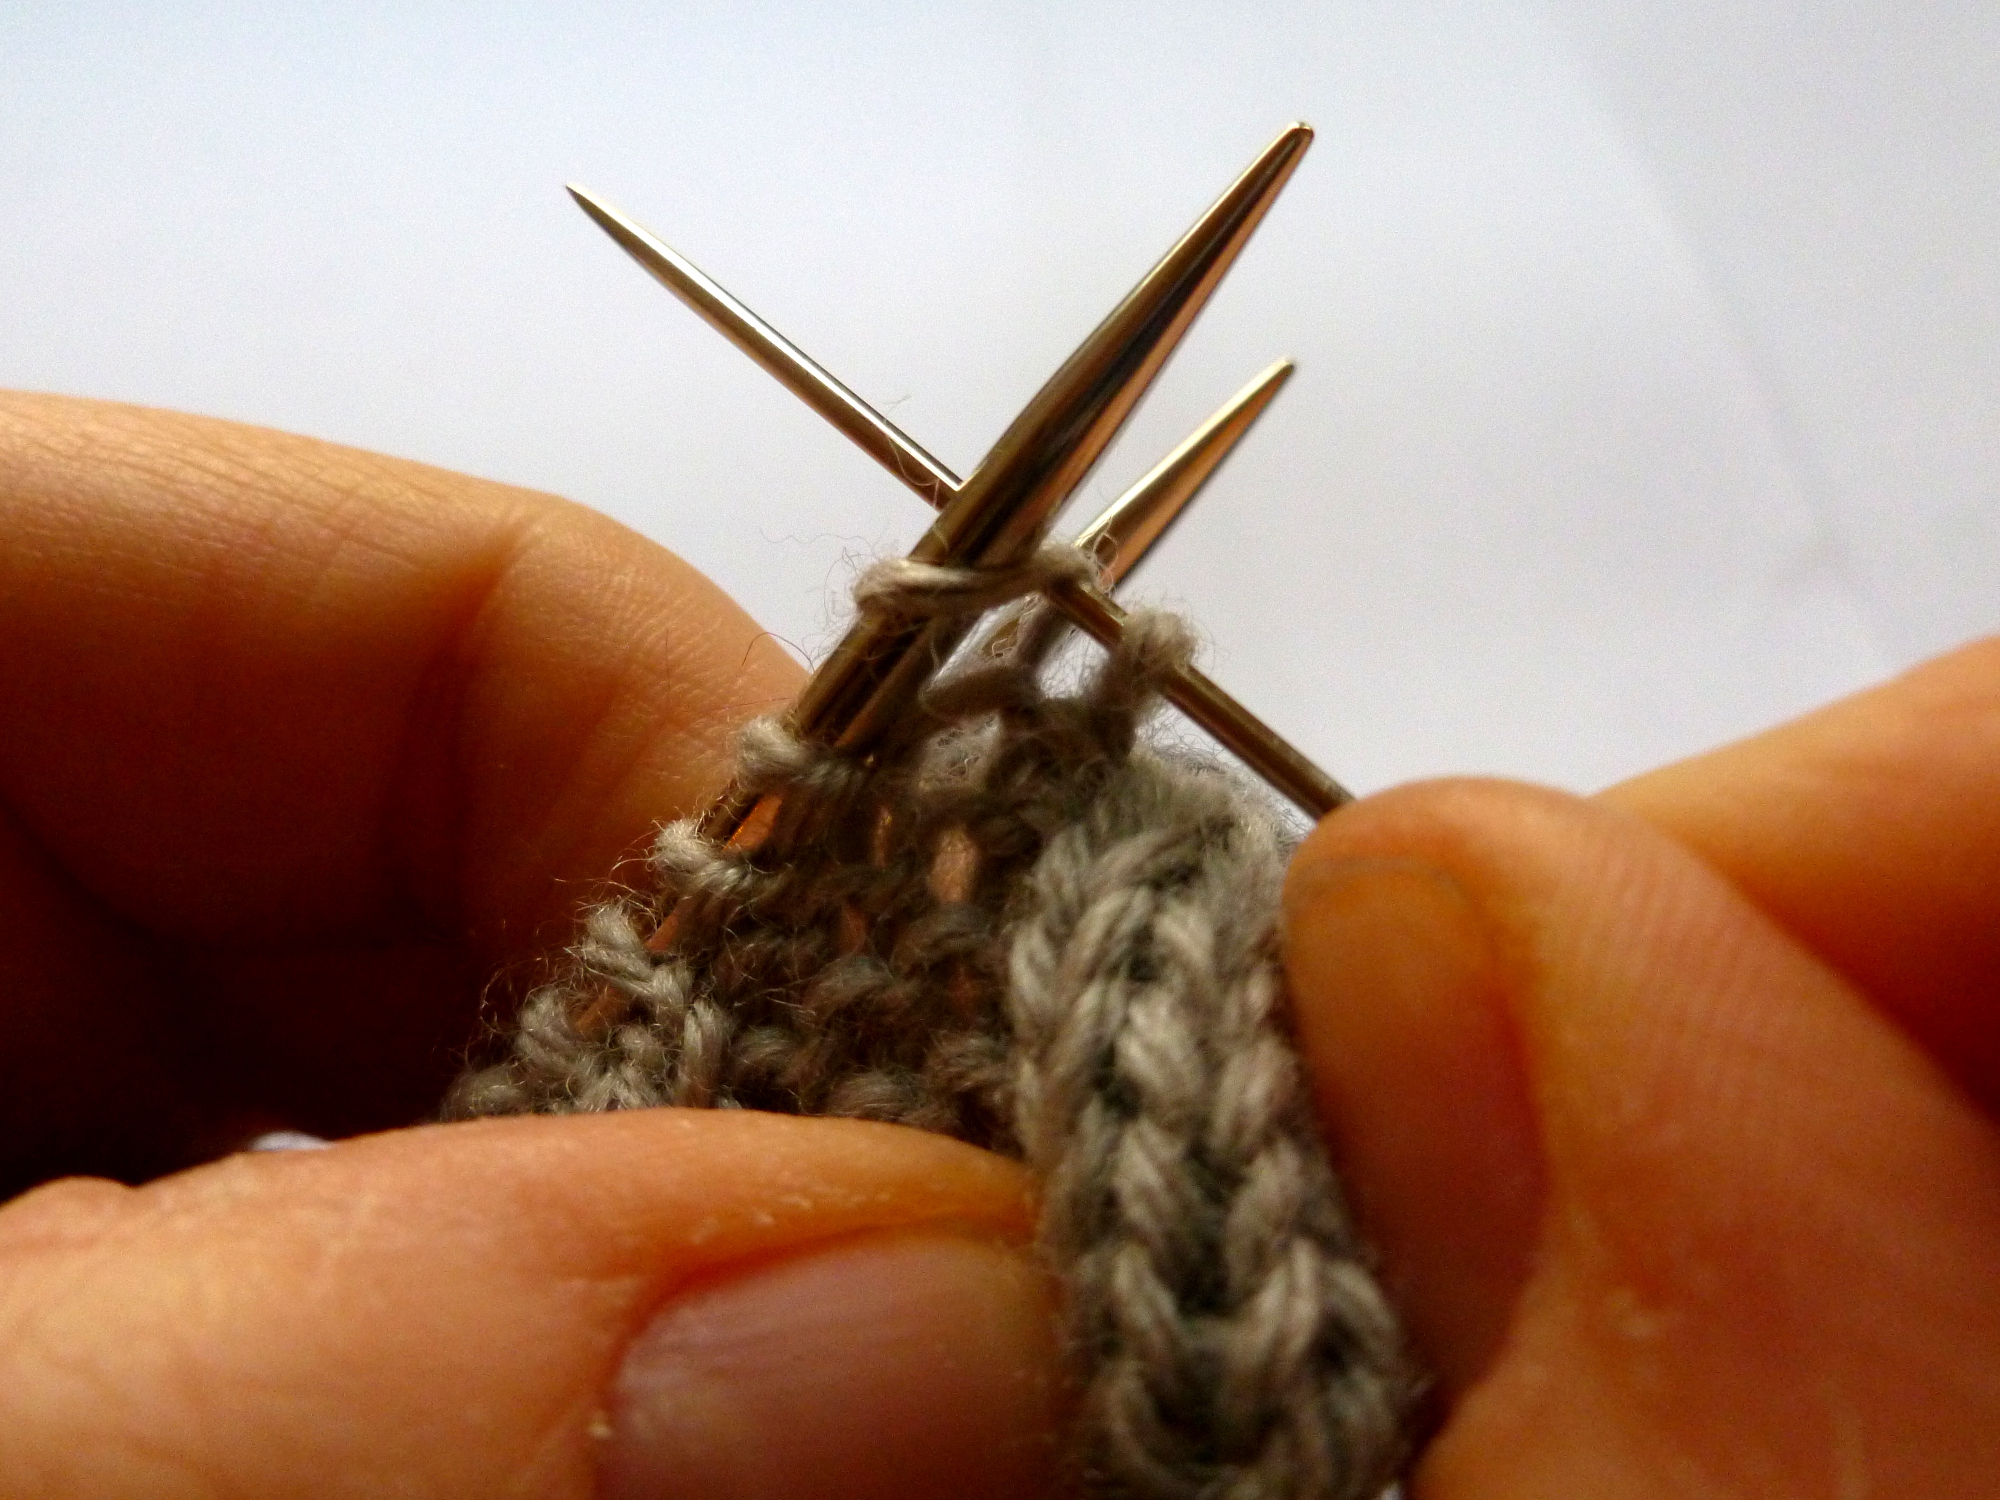


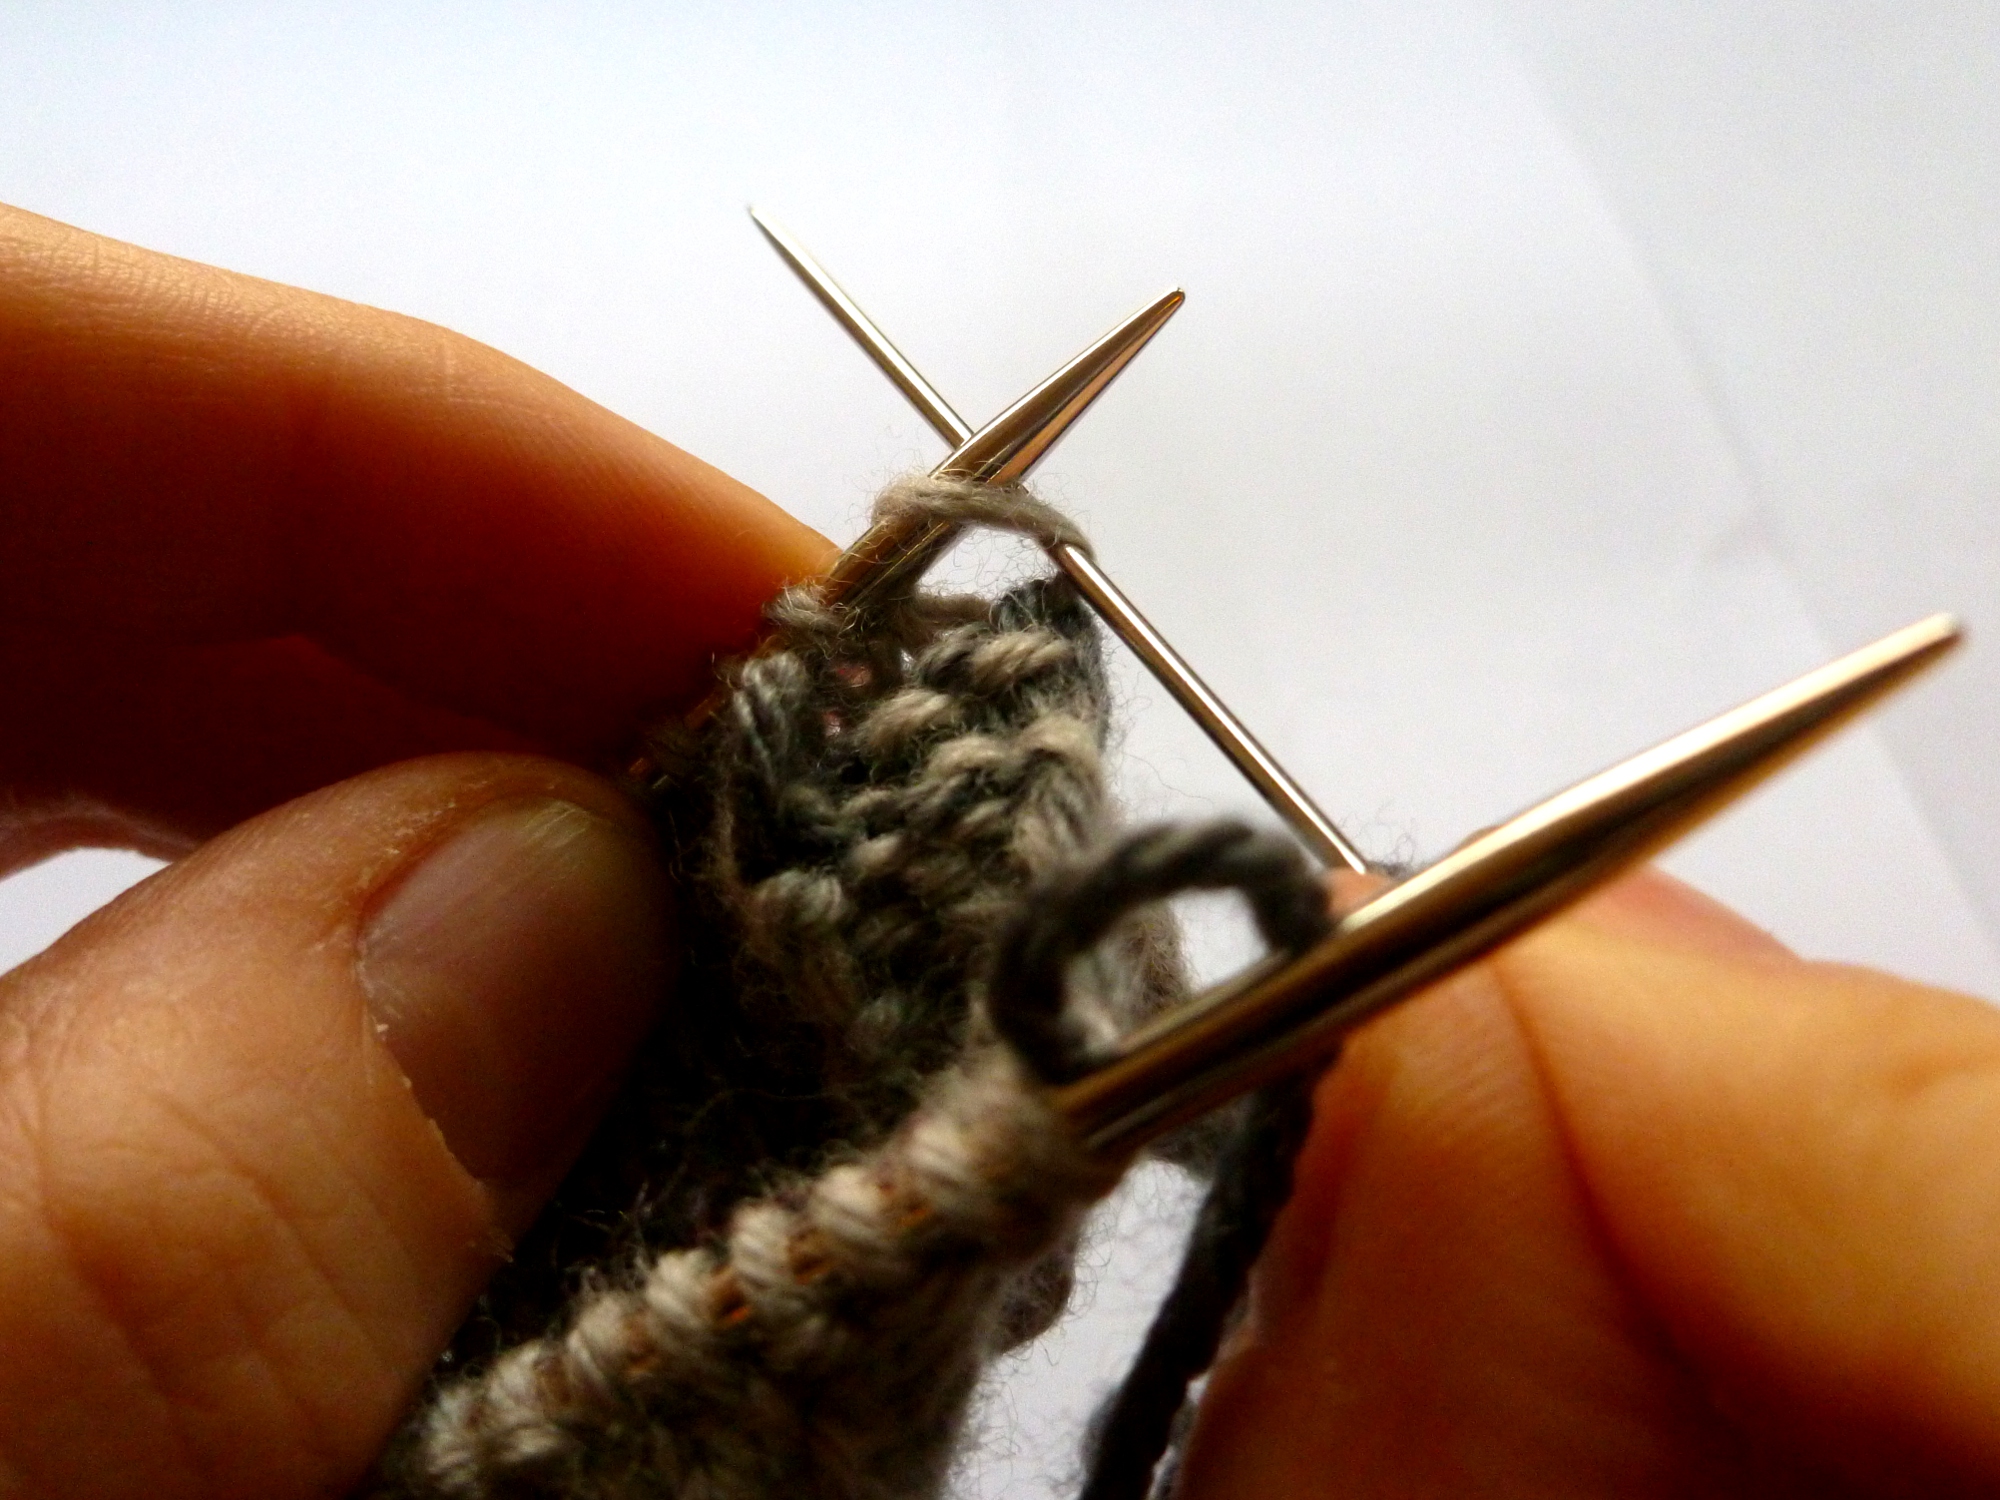
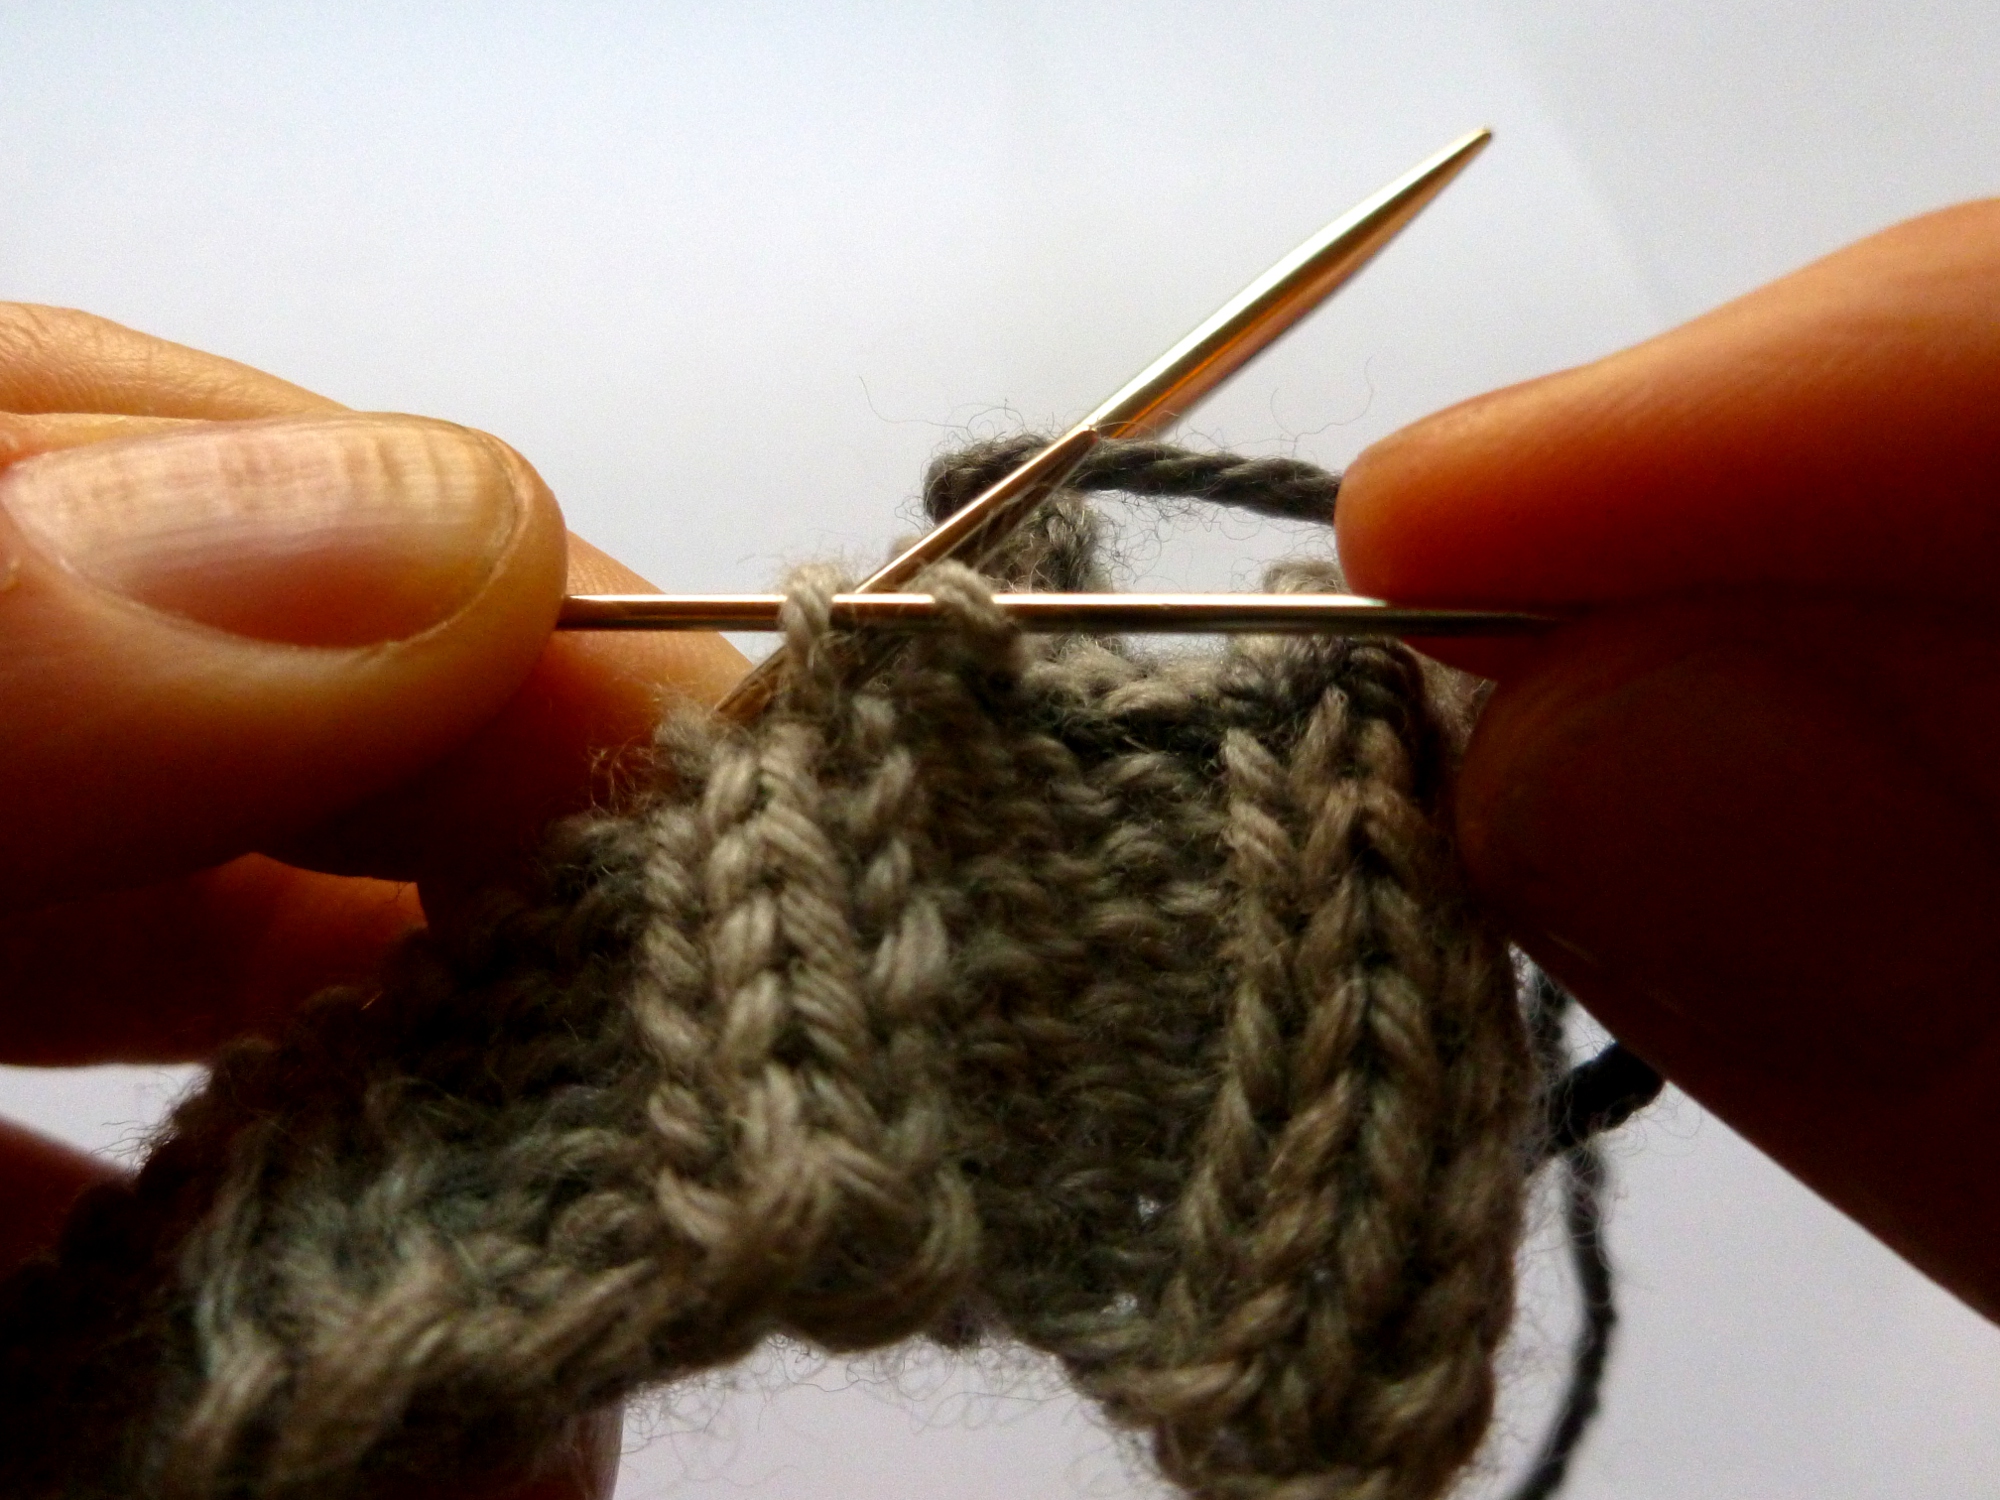
Continue in reverse stockinette grafting, until the next 2 sts on the front needle are a p st followed by a k st. Like this:

This time the pattern needs to be purl off, purl on... purl off, knit on:


And that's everything you need to know to graft in pattern! Continue to work across the row. Remember: if you have 2 or more k sts next on your front needle, you use stockinette grafting. If you have 2 or more p sts on your front needle, you use reverse stockinette grafting. It's the transitions between k and p sts that you have to watch out for!
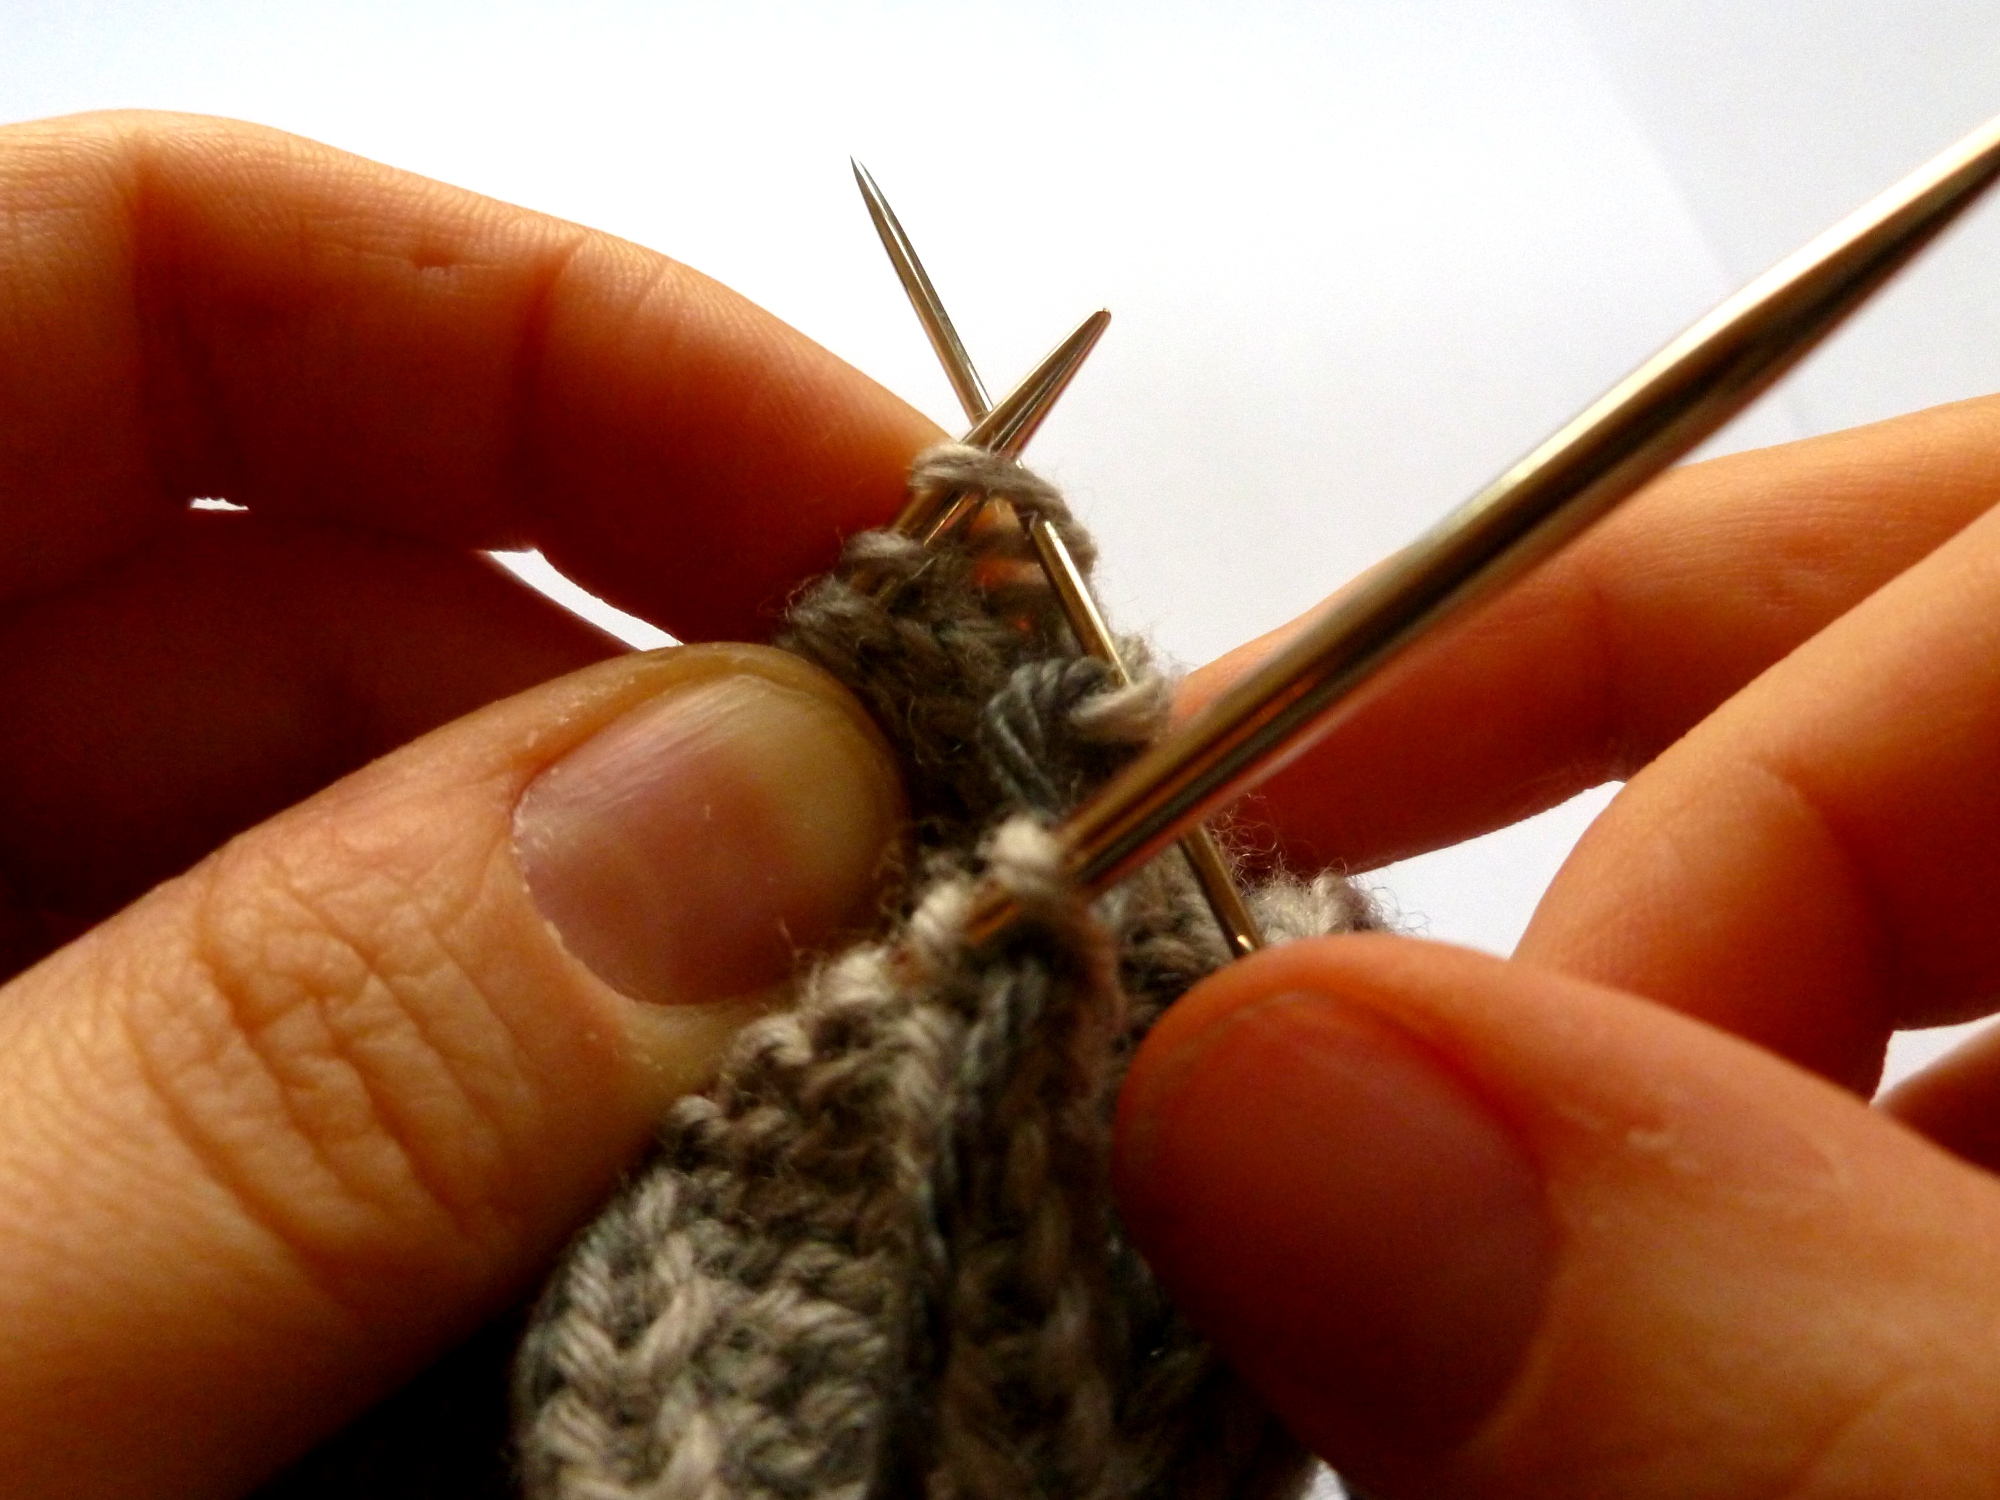
Finished result, after tension has been adjusted a little bit along the grafting line:

As you can see (I hope!), if I hadn't used a different coloured yarn for the graft, the result would be practically invisible.
Hope this tutorial was helpful and feel free to ask any questions!
P.S. Here's a video demonstrating the grafting in progress:
[youtube http://www.youtube.com/watch?v=ngY2tmg9DPs&w=480&h=360]