
Edit [20 Nov 2016]: I've revisited this tutorial to add some clearer photos, however most of the content remains the same.
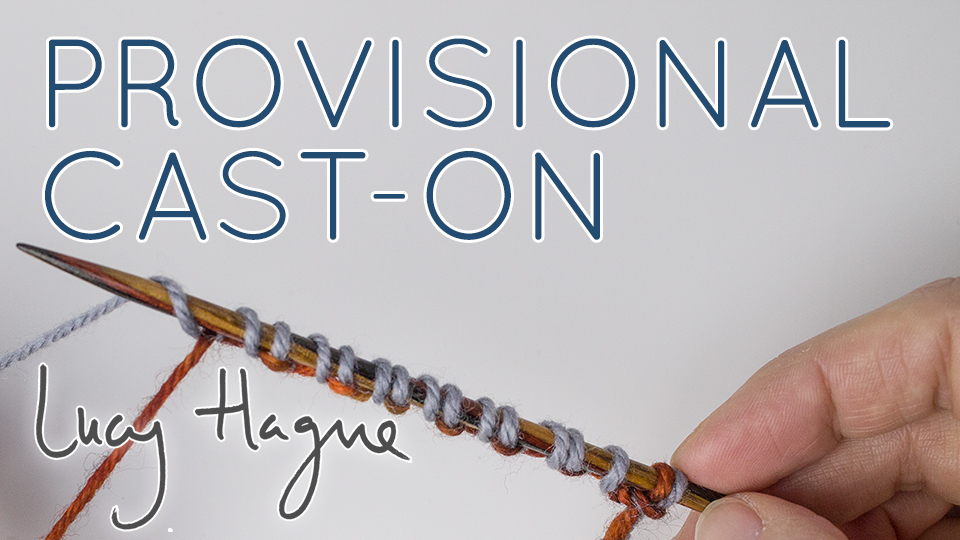
Here's a little photo tutorial on how to do my favourite provisional cast-on, the invisible cast-on.
A little background: there are a few different methods for working a provisional cast-on, all with the same goal - to provide a starting point for your work, and to leave your first row of stitches on a strand of waste yarn which can be easily removed, so that you can put the bases of your stitches back onto a needle and either knit in the opposite direction or simply cast off. This is really useful for a number of reasons... if you want both ends of a scarf to match, you could start with a provisional cast-on, knit to the end, cast off, and then go back to the beginning, unpick your provisional cast-on and use the same cast-off. That's just one example; there are many more. Provisional cast-ons are really useful in lace-knitting, too. Overall, it's a very handy skill to have in your bag of tricks!
The crochet provisional cast-on is very widely known, indeed, it was the first one I learnt. When you use the crochet provisional cast-on, the sts go onto your (left) needle from left to right, then you immediately work the first row. When you use the invisible provisional cast-on, the stitches go onto the (right) needle from right to left, then (if knitting flat) you turn and work a WS row (so, a purl row if you're working in stocking stitch). The invisible provisional cast-on leaves all your stitches on a strand of waste yarn, so it's very easy to remove the waste yarn and get the stitches back on the needle (easier than with the crochet provisional cast-on, which you have to "unzip").
So, here we go. An explanation of the invisible provisional cast-on!
You need some nice smooth waste yarn, ideally in a contrasting colour to your working yarn. It will make it easier to get the stitches back onto the needle if you use a waste yarn that is at least as thick as (and ideally a little thicker than) your working yarn.
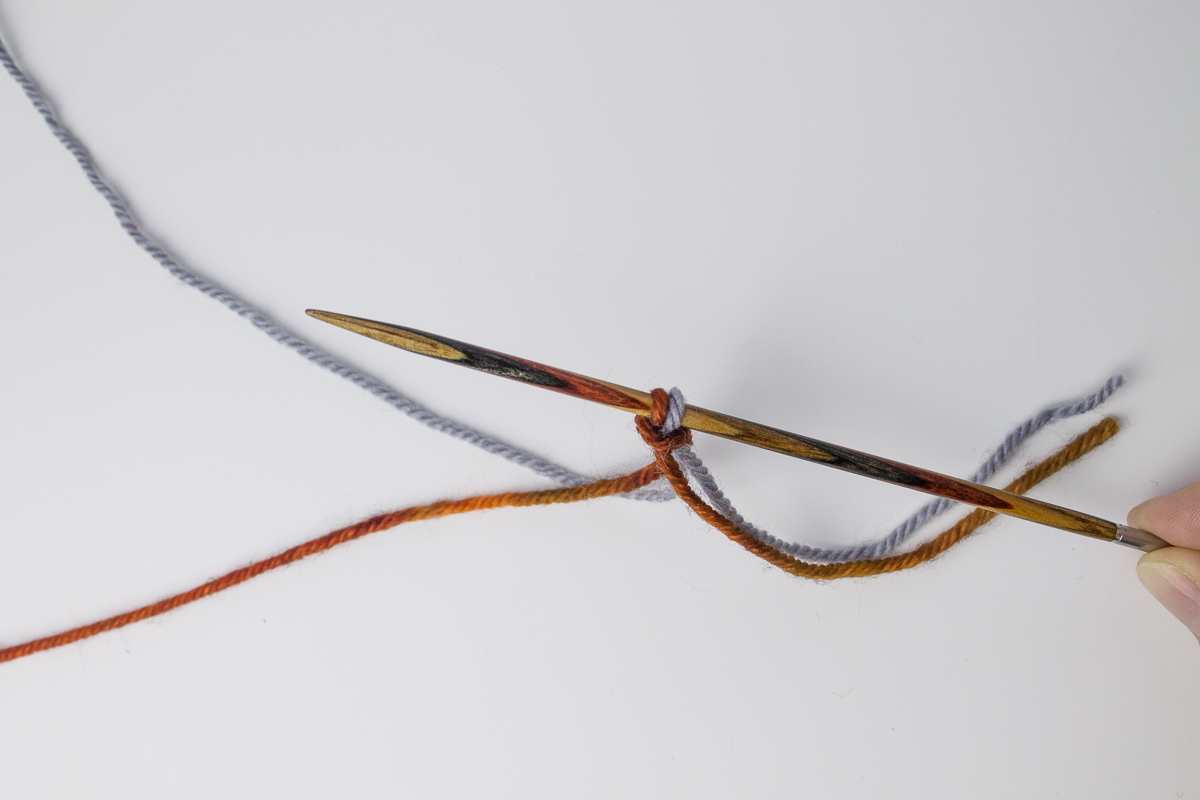
To help you follow the pictures, my waste yarn is orange and my working yarn is grey. Lay your waste yarn and working yarn together and put a slip knot in them (leaving a bit of a tail to weave in at the end):

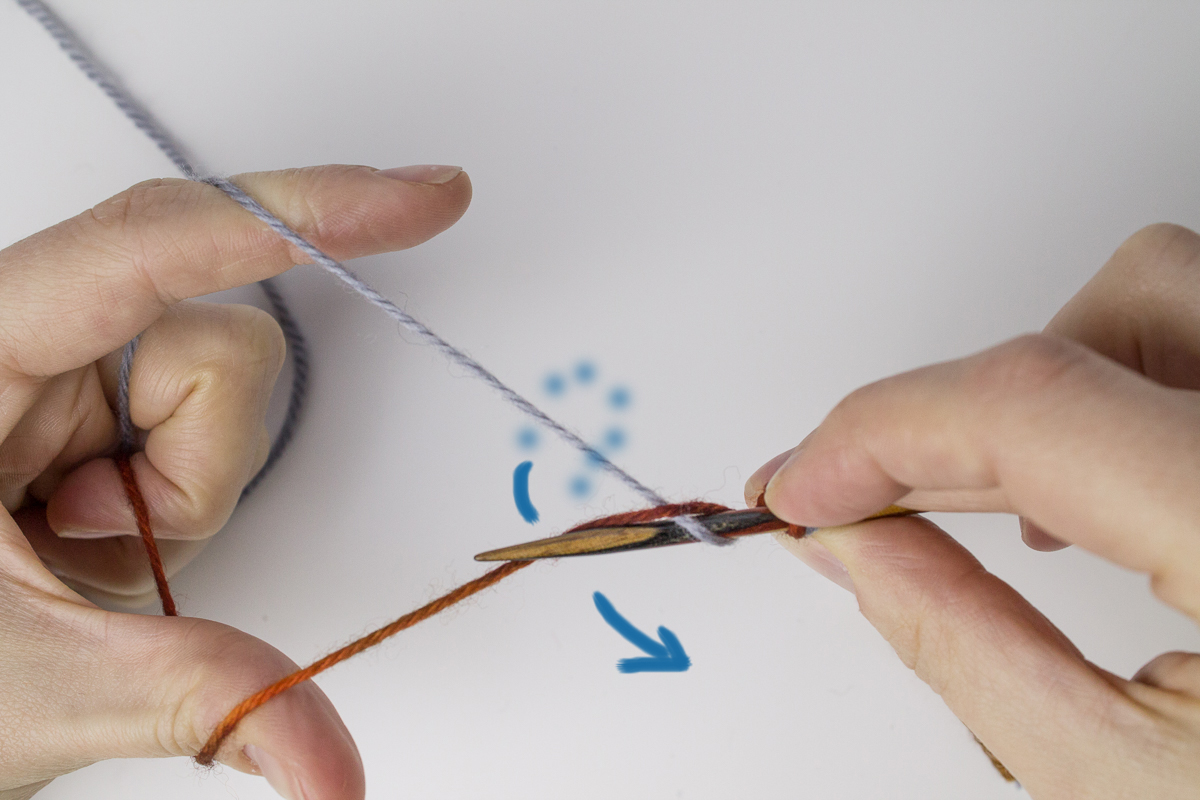
Put your slip knot onto the needle, and tension the yarns similarly to how you would when working a long-tail cast-on. The waste yarn is over your thumb, the working yarn over the index finger, and both yarns are grasped together in your palm (you can tension the yarns as you usually would when knitting, or just hold them loosely):

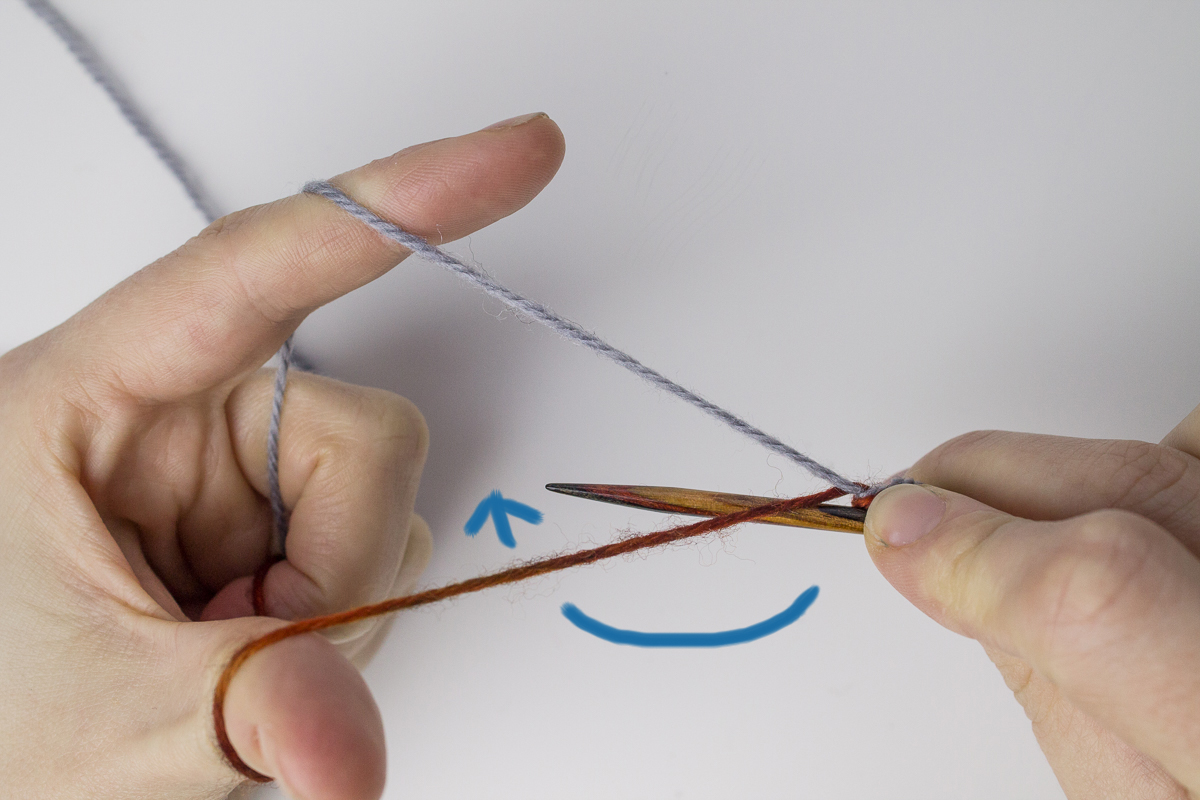
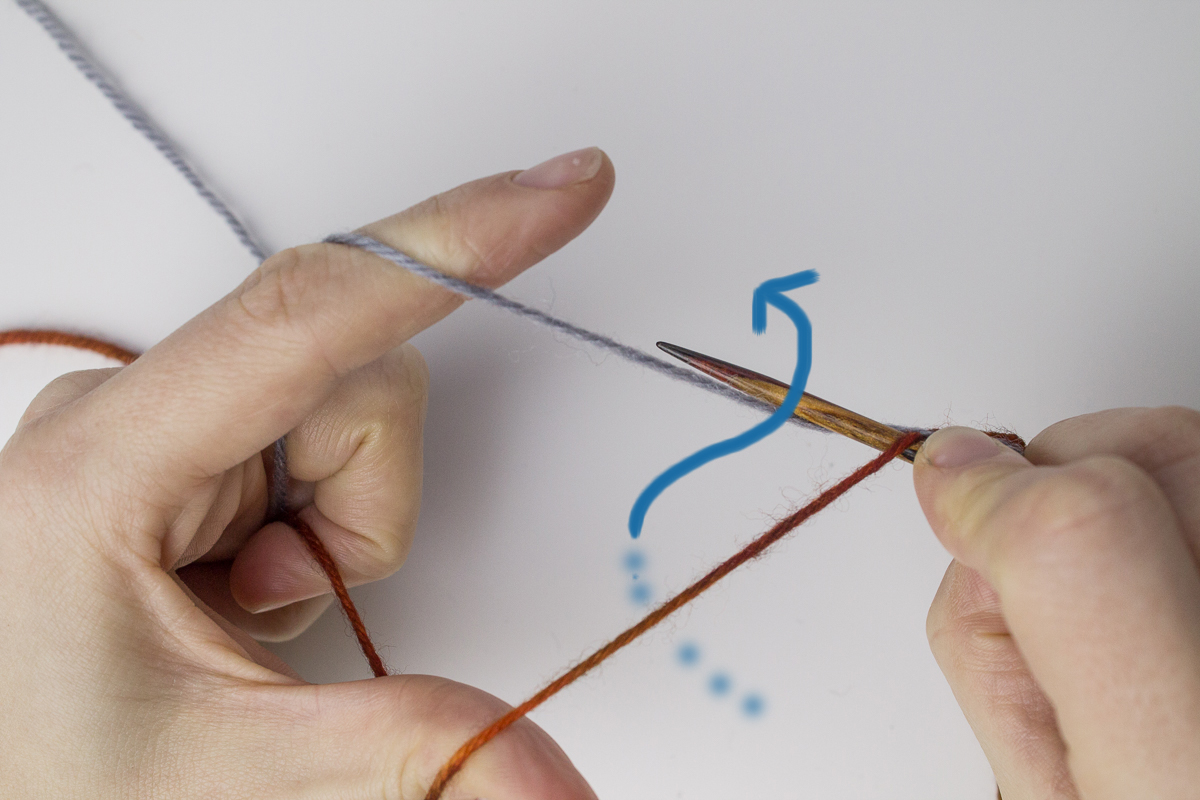
Bring your right needle to the front, and then under the waste yarn with your needle (hold the slip knot with your right index finger and/or thumb so it doesn't move around):

Then bring your needle over the working yarn (dotted line shows previous path of needle, solid line shows current path):

Scoop the working yarn under the waste yarn:

... and bring your needle back to its starting position. One stitch has been cast on:

To cast on your next stitch, bring the right needle from the back and under the working yarn:
That's your second cast-on stitch; I know it seems a little strange, just sitting there like a yarn-over, but it makes more sense one you cast-on the third stitch. Follow the directions exactly as for casting on the first stitch (it helps if you hold the stitch just cast-on with your right index finger and/or thumb, as you did initially with the slip-knot, just to stop it moving around)...:

...and now the second stitch is properly anchored. There should be three cast-on stitches on your needle (along with the beginning slip-knot):

That's all there is to it. As you can see, the even-numbered cast-on stitches are not really cast-on in the true sense... they only become properly anchored stitches once you complete the next (odd-numbered) stitch. Because of this, you have to exercise a little bit of care if you are casting on an even number of sts. When you turn to work your first (WS) row, it will look like this:

As you can see, the working yarn is wrapped round the needle like a yarn-over but there is no waste yarn anchoring it at the base. This makes it impossible to work the first st. What you need to do is twist the waste yarn around to the front, like this:

... and then just work all your stitches as normal (I'm purling these stitches).


When you get to the slip knot, just drop it off the needle and ignore it:
When it comes time to undo your provisional cast-on, you will undo the slip-knot and take the waste yarn out of the stitches. For now, you can just leave it hanging there
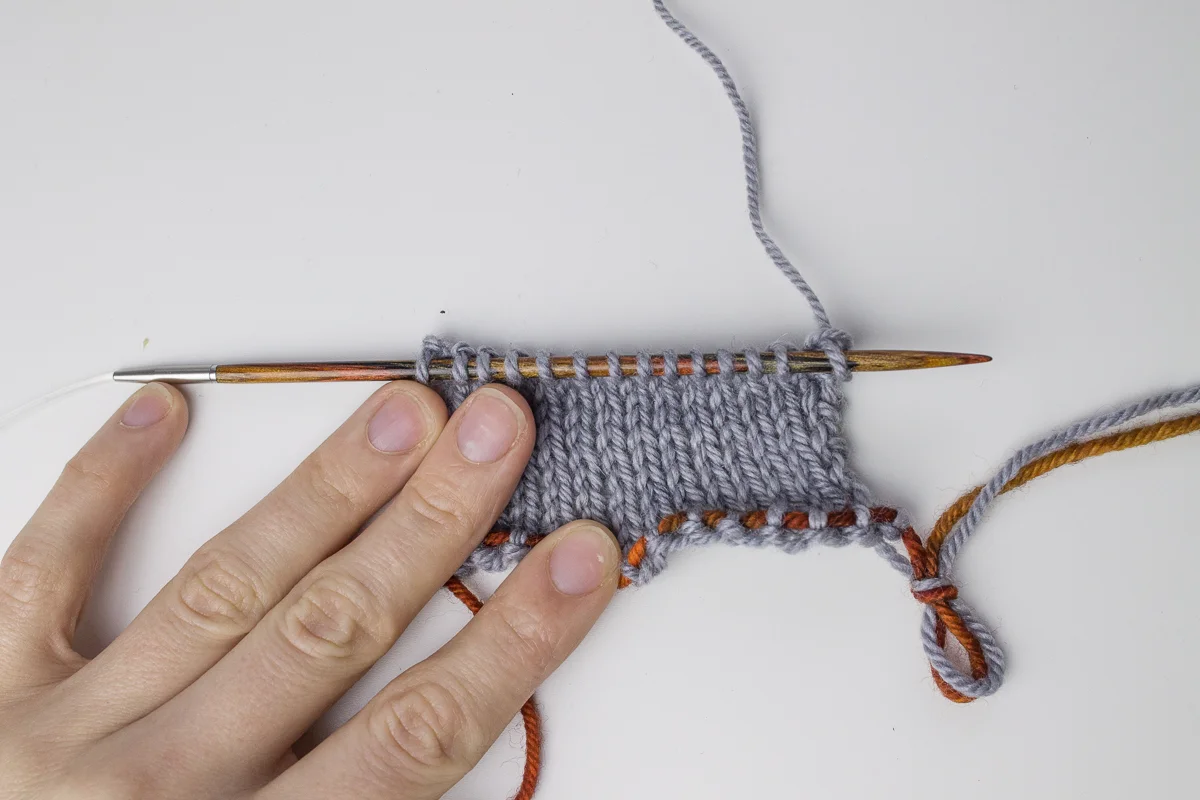
As you can see, once you work a few rows, this cast-on truly is invisible. The waste yarn is running neatly and unimpeded through the bases of all your sts, rather like a lifeline:

Picking up stitches from this provisional cast-on is pretty straightforward. One thing to watch out for though is that half of the stitches will be oriented the opposite way to normal (i.e. they will have the right leg of the stitch at the back of the needle, instead of at the front). You can correct this when slipping the stitches off the waste yarn, or just pick them up as is and then re-orient them by slipping onto a second needle:

I find it easiest to pick up 3 or 4 stitches at a time, then gently pull out the waste yarn as I go:

When you get to the end, you can pull out the slip-knot and the rest of the waste yarn. I've tried to show in this picture how some of the stitches are oriented backwards (tricky to photograph!):

Here I'm slipping all the stitches to a second needle, and re-orienting as I go (by slipping each stitch purlwise with the needle behind the right leg of each stitch):

Here's how it looks once all stitches from the provisional cast-on have been transferred back onto the needle and properly oriented, ready to be worked:
I hope you found this tutorial helpful, and that learning how to work provisional cast-ons will lead you to new and interesting directions in your knitting!